
Disclaimer: This post contain some affiliate links , so if you buy through these links I may get some commission with no extra cost to you.
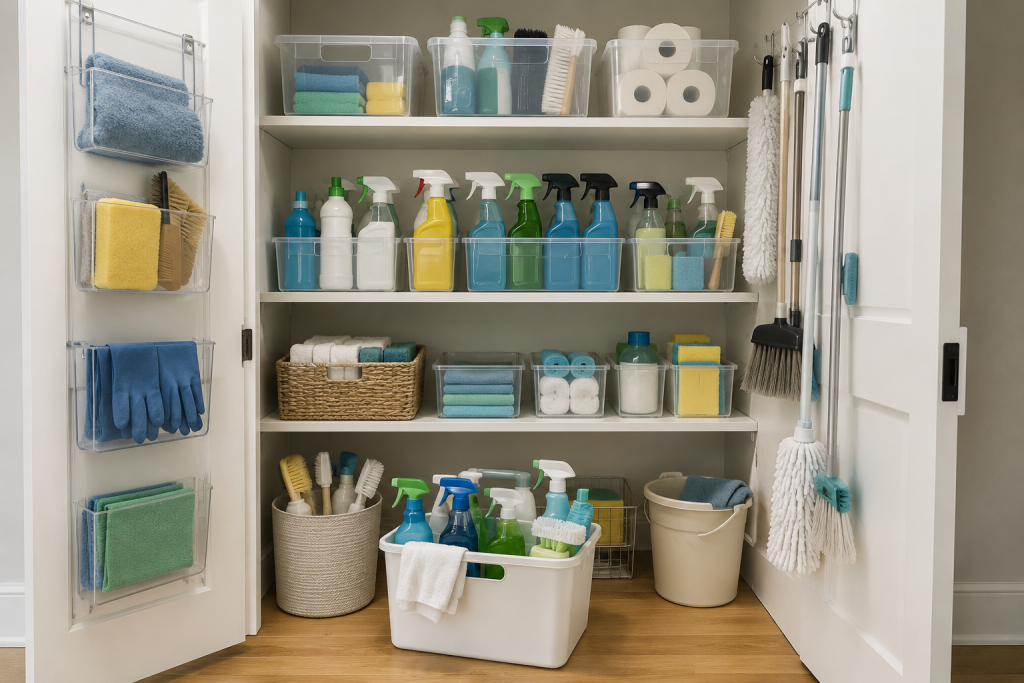
Cleaning your home is much easier when you know exactly where every product and tool is. But if your cleaning supplies are scattered under the kitchen sink, stuffed into random cabinets, or piled in a messy closet, even a quick cleaning task can become frustrating.
Professional organizers don’t necessarily own more storage products—they simply have a system that makes everything easy to find and put away. The good news is that you can create the same organized setup without spending a lot of money.
In this guide, you’ll learn practical ways to organize your cleaning supplies, maximize storage space, reduce clutter, and make your cleaning routine faster and more enjoyable.
1. Gather Every Cleaning Supply in One Place
Before you buy storage bins or start organizing, collect every cleaning product and tool from around your home. This step may seem simple, but it’s one of the most important parts of the organizing process.
You might have cleaning products stored in multiple places, such as:
- Under the kitchen sink
- Bathroom cabinets
- Laundry room
- Cleaning closet
- Garage shelves
- Utility room
Bring everything together in one area so you can see exactly what you own.
You may be surprised to find:
- Three bottles of glass cleaner
- Several half-empty all-purpose sprays
- Old sponges you’ve forgotten about
- Duplicate scrub brushes
- Extra packs of microfiber cloths
Seeing everything at once makes it much easier to decide what to keep and what you no longer need.
Place similar items together as you gather them. This makes the next organizing steps much quicker.
2. Throw Away What You Don’t Need
Professional organizers always declutter before organizing. There’s no point creating storage space for products you’ll never use.
Go through each item carefully and remove anything that’s damaged, empty, or no longer effective.
Look for:
- Empty spray bottles
- Dried-out cleaning wipes
- Worn sponges
- Torn microfiber cloths
- Broken scrub brushes
- Rusty cleaning tools
- Leaking bottles
- Products you never use
If you find duplicate cleaners, decide whether you really need both. Keeping one unopened backup is fine, but storing five bottles of the same cleaner usually wastes valuable space.
Check expiration dates
Some disinfectants and specialty cleaners lose their effectiveness over time. Read the label and safely dispose of products that are expired or no longer usable.
Never pour household chemicals down the drain unless the product label specifically says it’s safe to do so. Follow your local disposal guidelines for hazardous household waste when necessary.
Decluttering first means you’ll organize only the products that actually help keep your home clean.
3. Sort Supplies by Cleaning Task
Instead of organizing by bottle size or brand, organize by the room or cleaning task. This is the method many professional organizers use because it saves time during your cleaning routine.
When everything for a specific job is stored together, you won’t have to search through several shelves every time you clean.
Kitchen Cleaning
Keep these items together:
- Dish soap
- Degreaser
- Countertop cleaner
- Stainless steel cleaner
- Sink cleaner
- Scrub sponge
Store them close to the kitchen whenever possible.
Bathroom Cleaning
Group together:
- Toilet bowl cleaner
- Bathroom disinfectant
- Tub and shower cleaner
- Tile cleaner
- Grout brush
- Toilet brush
- Cleaning gloves
Having a dedicated bathroom cleaning section makes weekly bathroom cleaning much quicker.
Floor Care
Keep floor-cleaning supplies together, including:
- Floor cleaner
- Mop solution
- Mop pads
- Vacuum attachments
- Broom
- Dustpan
This way, everything you need for cleaning floors is always in one place.
Dusting Supplies
Create a small dusting kit with:
- Microfiber cloths
- Extendable duster
- Furniture polish
- Electronics cleaning cloth
You can grab this kit whenever you need to dust shelves, furniture, or electronics.
Laundry Supplies
Store laundry products together, including:
- Laundry detergent
- Fabric softener
- Stain remover
- Dryer sheets
- Laundry sanitizer
- Mesh laundry bags
Keeping everything in one basket or shelf makes laundry day much more organized.
Why this works: Organizing by task reduces the number of trips you make while cleaning and helps every member of the household find what they need.
4. Use Clear Storage Bins
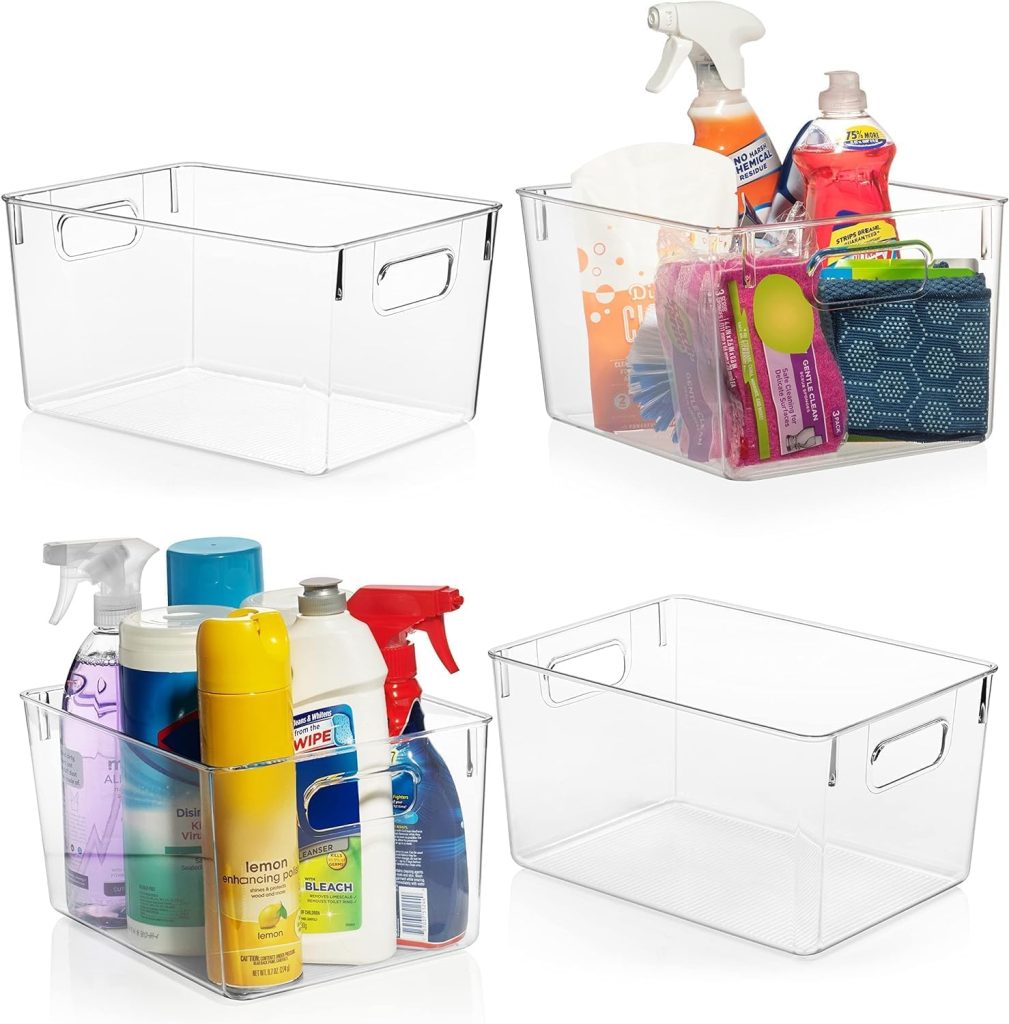
One of the easiest ways to organize cleaning supplies like a professional is by using clear storage bins.
Instead of lining bottles across a shelf, place similar products inside labeled bins. This keeps everything neat and prevents bottles from tipping over.
Clear bins also let you see what’s inside without opening every container.
Some helpful categories include:
- Bathroom Cleaning
- Kitchen Cleaning
- Floor Care
- Laundry
- Dusting
- Cleaning Cloths
- Refills
- Extra Supplies
If you’re organizing deep shelves, choose bins with built-in handles. This allows you to pull the entire bin out instead of reaching into the back of the cabinet.
Stackable bins are another great option for maximizing vertical space, especially in small laundry rooms or utility closets.
Choose the right size
Avoid buying oversized containers. A bin that’s too large often becomes a place where random items collect over time.
Instead, choose bins that comfortably fit the products you use most often. Leave a little extra space so you can easily take items in and out without creating clutter.
Add simple labels
Labels help everyone in the household return items to the correct place.
You can use:
- Printed labels
- Waterproof labels
- Chalk labels
- Label maker stickers
- Handwritten tags
Even simple labels like Kitchen, Bathroom, and Laundry can make a big difference.
5. Create a Portable Cleaning Caddy
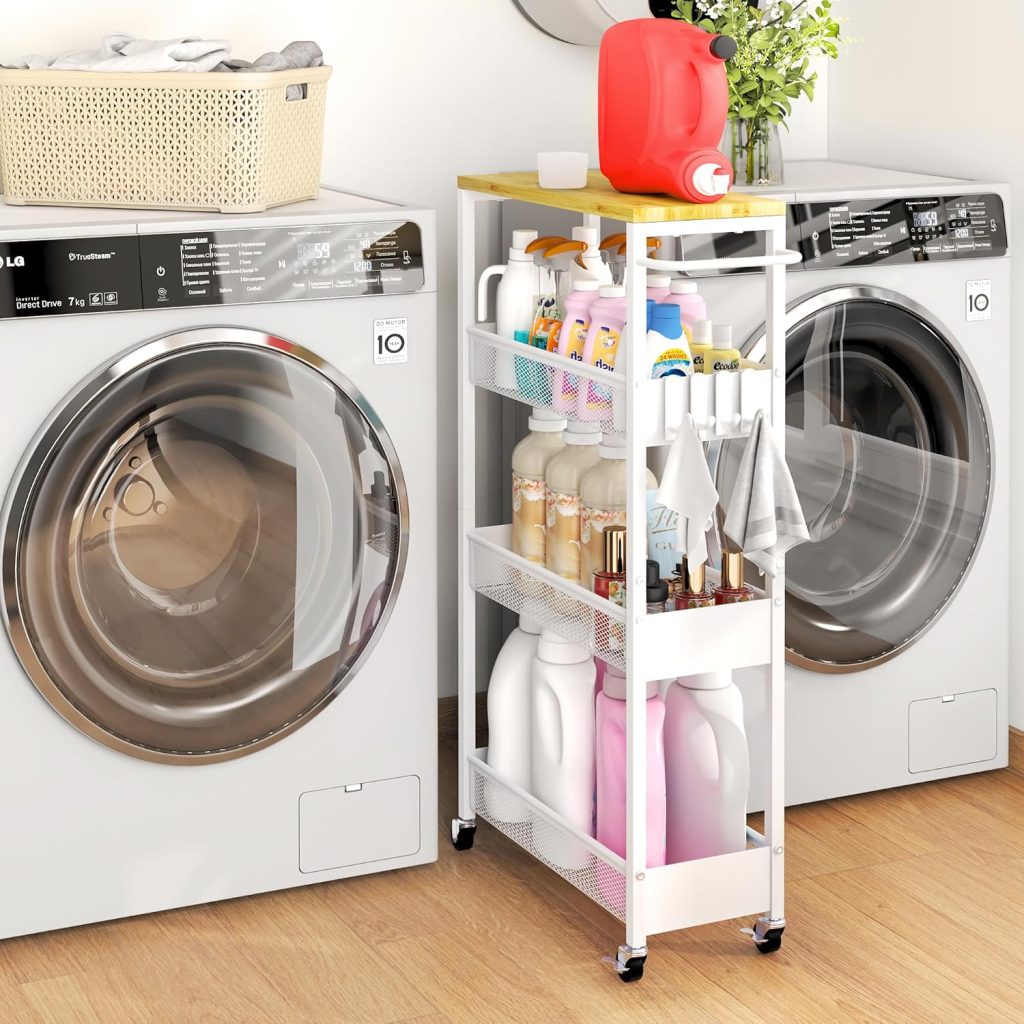
One of the best tricks professional cleaners use is carrying a portable cleaning caddy. Instead of walking back and forth to grab different products, you can take everything you need from room to room in one trip.
A cleaning caddy doesn’t have to be expensive. A simple plastic tote with a handle works just as well as a fancy organizer.
What to Keep in Your Cleaning Caddy
Choose products you use for everyday cleaning, such as:
- All-purpose cleaner
- Glass cleaner
- Disinfecting spray
- Microfiber cloths
- Scrub sponge
- Small scrub brush
- Rubber gloves
- Magic eraser
- Dusting cloth
Keep the caddy lightweight so it’s easy to carry around the house.
If you have a two-story home, consider keeping one cleaning caddy upstairs and another downstairs. This saves time and reduces the number of trips you make while cleaning.
Why It Works
A portable cleaning caddy helps you:
- Finish cleaning faster
- Stay organized
- Avoid forgetting supplies
- Make quick daily cleanups easier
Professional organizers love this system because everything needed for basic cleaning is always within reach.
6. Organize Under the Kitchen Sink
The cabinet under the kitchen sink often becomes a catch-all for cleaning products, trash bags, and random household items. With a few simple storage solutions, you can turn this cramped space into an organized cleaning station.
Before organizing, wipe down the cabinet and check for any leaks or moisture. Water damage can ruin cleaning products and create unpleasant odors.
Use Pull-Out Storage
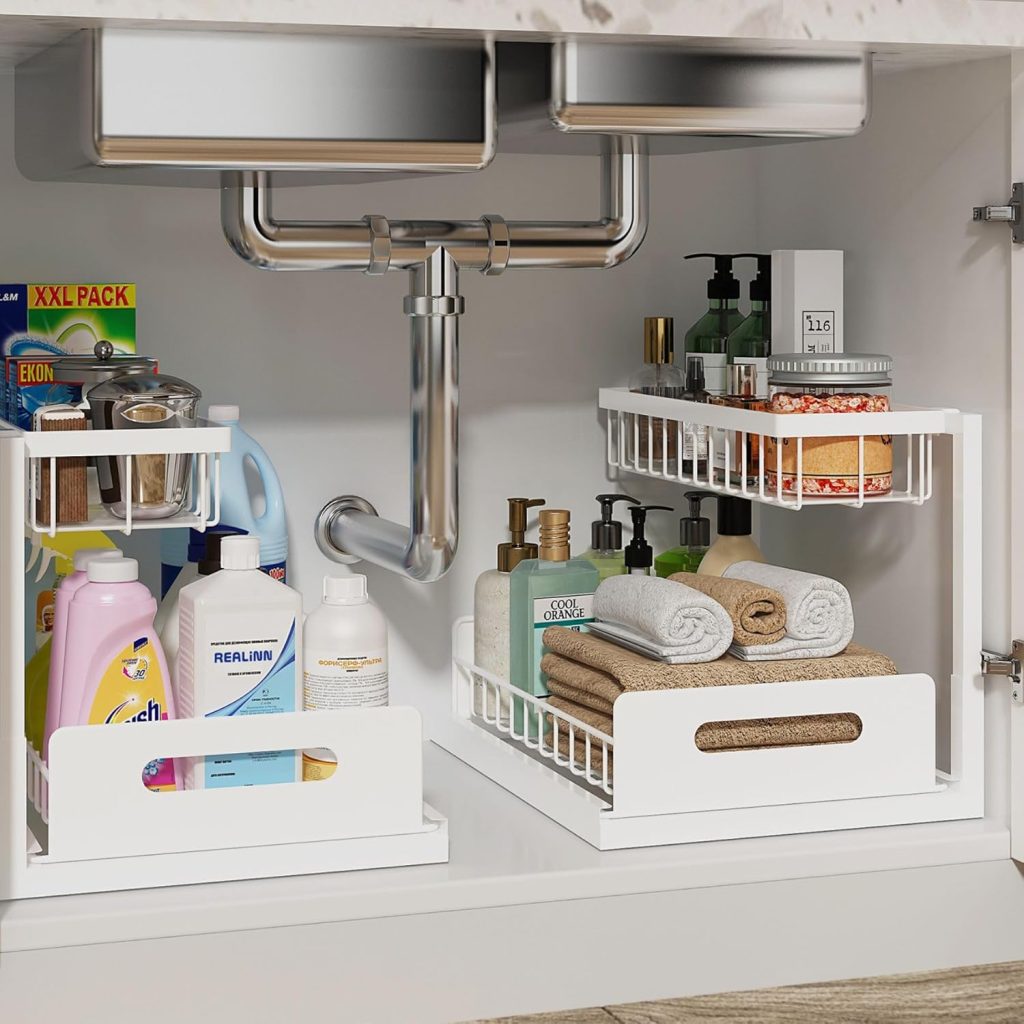
Pull-out drawers or sliding baskets make it much easier to reach products stored at the back of the cabinet.
Instead of moving everything around to find one bottle, simply slide the organizer out.
These work especially well for:
- Spray bottles
- Cleaning cloths
- Dishwashing supplies
- Extra sponges
- Shop Here
Hang Spray Bottles on a Tension Rod
Install a small tension rod across the cabinet.
The spray bottle handles can hang from the rod, leaving the bottom of the cabinet free for other storage.
This simple trick:
- Saves space
- Keeps bottles upright
- Makes products easy to grab
Add Small Bins
Use separate bins for different categories, such as:
- Dishwasher supplies
- Trash bags
- Extra sponges
- Rubber gloves
- Cleaning tablets
Bins prevent small items from getting lost in the back of the cabinet.
Use the Cabinet Door
The inside of the cabinet door is valuable storage space.
Attach small organizers or adhesive baskets to store:
- Sponges
- Gloves
- Scrub brushes
- Cleaning cloths
This keeps frequently used items within easy reach.
Avoid Overcrowding
Leave a little empty space between products.
When shelves or cabinets are packed too tightly, it’s harder to find what you need and easier for clutter to build up again.
7. Make the Most of a Cleaning Closet
If you’re lucky enough to have a dedicated cleaning closet, organizing it properly can save you a lot of time.
Instead of stacking everything on the floor, think vertically.
Professional organizers use wall space just as much as shelf space.
Install Wall Hooks
Hooks are perfect for hanging:
- Brooms
- Mops
- Dustpans
- Dusting tools
- Reusable shopping bags
Keeping long-handled tools off the floor instantly makes the closet look cleaner.
Use Broom Holders
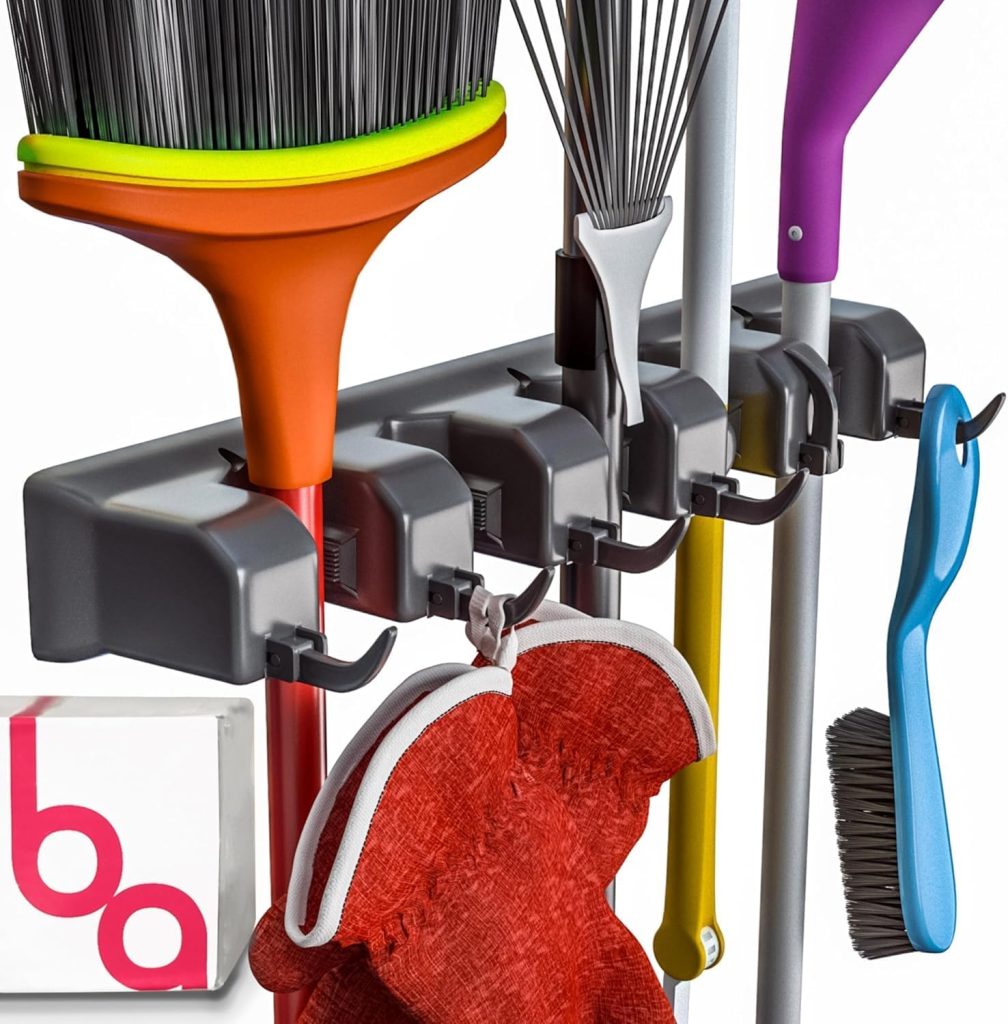
Wall-mounted broom holders keep tools neatly lined up.
They prevent mops and brooms from falling over every time you open the door.
Many holders also include extra hooks for smaller cleaning tools.
Store Products on Shelves
Arrange shelves by category.
For example:
Top Shelf
- Backup supplies
- Paper towels
- Extra cleaners
Middle Shelf
- Everyday cleaning products
- Portable cleaning caddy
- Microfiber cloths
Bottom Shelf
- Buckets
- Vacuum attachments
- Heavy cleaning products
Keeping heavier items on lower shelves makes them safer and easier to lift.
Use Matching Storage Bins
Matching bins create a cleaner, more organized appearance.
Assign one bin for each category:
- Bathroom
- Kitchen
- Laundry
- Floors
- Dusting
- Refills
Label every bin clearly so everyone knows where items belong.
8. Store Frequently Used Products at Eye Level
One simple habit makes a huge difference—keep the products you use most where they’re easiest to reach.
Eye-level storage reduces bending, searching, and unnecessary movement during your cleaning routine.
Think about how often you use each product.
Daily Cleaning Supplies
Store these where they’re easiest to grab:
- All-purpose cleaner
- Glass cleaner
- Microfiber cloths
- Disinfecting wipes
- Dish soap
Weekly Cleaning Supplies
These can go on nearby shelves:
- Toilet cleaner
- Bathroom spray
- Floor cleaner
- Furniture polish
- Dusting spray
Monthly or Seasonal Products
Store less frequently used products higher up or toward the back.
Examples include:
- Carpet cleaner
- Oven cleaner
- Stainless steel polish
- Outdoor cleaners
- Window washing supplies
This simple system keeps your everyday essentials front and center while reducing cabinet clutter.
9. Keep Cleaning Tools Separate
Cleaning products aren’t the only things that need organizing. Your tools deserve their own storage system too.
When brushes, cloths, gloves, and mop pads are mixed together, it’s harder to keep everything clean and sanitary.
Separate by Type
Store similar tools together, such as:
Cleaning Cloths
- Microfiber cloths
- Dusting cloths
- Polishing cloths
Brushes
- Scrub brushes
- Grout brushes
- Bottle brushes
Sponges
- Kitchen sponges
- Heavy-duty scrub pads
- Magic erasers
Protective Items
- Rubber gloves
- Disposable gloves
- Face masks (if used)
Use Drawer Dividers
Drawer dividers work well for smaller tools.
Separate sections can hold:
- Gloves
- Scrub brushes
- Scouring pads
- Replacement sponge heads
- Cleaning tablets
Everything stays visible and easy to grab.
Hang Larger Tools
Items like mops, dusters, and brooms should hang whenever possible.
Hanging tools:
- Dry faster
- Stay cleaner
- Last longer
- Free up valuable floor space
Wash Reusable Tools Regularly
Professional organizers know that clean storage starts with clean tools.
Remember to:
- Wash microfiber cloths after use.
- Replace worn-out sponges regularly.
- Let brushes dry completely before storing them.
- Clean mop heads according to the manufacturer’s instructions.
- Taking care of your cleaning tools helps them work better and extends their lifespan.
10. Label Everything
Once every cleaning product has a designated place, the final step is making sure it stays that way. Labels help everyone in your household know exactly where items belong, making it much easier to keep your storage system organized.
You don’t need a fancy label maker to get started. Even simple handwritten labels can make a big difference.
Label Your Storage Bins
Add clear labels to bins, baskets, or shelves, such as:
- Kitchen Cleaning
- Bathroom Cleaning
- Floor Care
- Laundry
- Dusting
- Glass Cleaner
- Extra Supplies
- Refills
When everything has a name, putting items away becomes almost automatic.
Use Waterproof Labels
Cleaning areas can be damp, especially under sinks or in laundry rooms. Waterproof labels are less likely to peel or fade over time.
Keep Labels Simple
Avoid long or complicated labels. Short, easy-to-read words are best because you can quickly identify what belongs in each container.
11. Don’t Forget Safety
A well-organized cleaning station should also be a safe one. Many cleaning products contain chemicals that need to be stored carefully.
Following a few simple safety rules protects your family, pets, and home.
Keep Products in Their Original Bottles
Never pour cleaning chemicals into unmarked containers or drink bottles. The original packaging includes important safety instructions and ingredient information.
Store Chemicals Upright
Always keep bottles standing upright with their lids tightly closed to prevent leaks and spills.
Keep Products Away from Children and Pets
Store cleaning products:
- On high shelves
- Inside locked cabinets
- In childproof storage if needed
Never leave cleaning supplies unattended where children or pets can reach them.
Never Mix Cleaning Products
Some household cleaners can create dangerous fumes when mixed together.
For example:
- Never mix bleach with ammonia.
- Avoid mixing bleach with vinegar.
- Follow the instructions on every product label.
When in doubt, use one cleaner at a time.
Check for Leaks
Every few months, inspect bottles for cracks or leaks. Wipe shelves if any products have spilled and replace damaged containers if necessary.
A few minutes of maintenance can prevent sticky shelves, unpleasant odors, and damaged cabinets.
12. Create a Simple Restocking Routine
Professional organizers know that staying organized is easier than reorganizing from scratch.
Instead of waiting until supplies run out or cabinets become cluttered, spend a few minutes each month checking your cleaning station.
Monthly Cleaning Supply Checklist
✔ Throw away empty bottles
✔ Refill reusable spray bottles
✔ Wash microfiber cloths
✔ Replace worn-out sponges
✔ Check gloves for holes
✔ Restock paper towels if needed
✔ Wipe shelves and storage bins
✔ Check expiration dates
This routine usually takes less than 15 minutes but helps keep everything neat and ready to use.
Buy Only What You Need
Sales can be tempting, but buying too many cleaning products often creates unnecessary clutter.
Before shopping, quickly check your storage area so you know what actually needs replacing.
A small inventory list on your phone can also help prevent buying duplicates.
Common Cleaning Supply Organization Mistakes
Even with the best intentions, a few common mistakes can make your storage system harder to maintain. Avoid these habits to keep your cleaning supplies organized for the long term.
Keeping Too Many Products
Many homes have multiple cleaners that do the same job. Stick to the products you actually use and avoid stocking up on unnecessary duplicates.
Ignoring Vertical Space
Walls, cabinet doors, and shelves offer valuable storage space. Adding hooks, hanging organizers, or stackable bins can dramatically increase storage without taking up more floor space.
Overstuffing Cabinets
If shelves are packed too tightly, it’s difficult to find what you need. Leave a little open space so products are easy to grab and return.
Forgetting to Label Containers
Without labels, bins quickly become mixed together. A few simple labels help everyone in the household maintain the organization system.
Storing Wet Cleaning Tools
Always let sponges, brushes, mop heads, and cloths dry completely before putting them away. This helps prevent mold, mildew, and unpleasant odors.
Buying Storage Before Decluttering
It’s easy to get excited about buying organizers, but you may not need as many as you think. Always declutter first, then choose storage solutions based on what you actually plan to keep.
Professional Organizer Tips
Want your cleaning supplies to stay organized for years? These simple habits are used by many professional organizers.
- Choose one all-purpose cleaner whenever possible instead of several specialty products.
- Store everyday cleaning supplies close to where you use them most.
- Use matching bins to create a tidy, cohesive look.
- Keep heavier bottles on lower shelves for easier lifting.
- Place labels on both the front and top of storage bins if they’re stored on high shelves.
- Replace old sponges and cloths regularly to keep your cleaning tools fresh.
- Review your cleaning supplies every season and remove products you no longer use.
- Return every item to its designated place after each cleaning session.
Remember, the goal isn’t perfection—it’s creating a system that’s easy to maintain.
Final Thoughts
Organizing your cleaning supplies like a professional doesn’t require expensive storage systems or a large utility room. By gathering everything in one place, removing items you no longer need, sorting products by task, and using simple storage solutions like clear bins and cleaning caddies, you can create a system that works for your home and your routine.
The key is consistency. Return items to their designated spots after each use, check your supplies once a month, and avoid buying products you don’t need. Small habits like these keep clutter from building up and make cleaning faster and less stressful.
Remember, an organized cleaning station isn’t just about looking neat—it’s about saving time, reducing waste, and making everyday chores feel much more manageable. Start with one cabinet or closet today, and you’ll enjoy the benefits every time it’s time to clean.